My grandson loves trains. Really he loves anything with wheels. Cah (car) is his favorite word right now. I wanted to get him a train table for Christmas but was not at all excited about paying $200 for one. I knew I could do it my self, and I did, for about $35, including the track and train!
Supply list
Ikea Lack coffee table
Ikea Lillabo 20 pc train set
craft paint
ModPodge
E6000 adhesive
I had everything but the table and the train set so it really was only $35. Now, I must warn you, I am a by the seat of my pants DIYer. I know there are tried and true methods of getting things done but I usually don't have the five million things or the expensive tools needed to be a true DIYer. Plus, I'm super short on patience. So quick, easy and done works for me.
First I assembled the table. This is very easy and the best part is there is a shelf on this coffee table so you can put bins under there to hold trains or miscellaneous cars, trees and buildings.
Once the table was assembled I put some painters table around the edge of the top so the paint wouldn't run down the sides. Not only am I not a rule follower but I'm a messy crafter too!
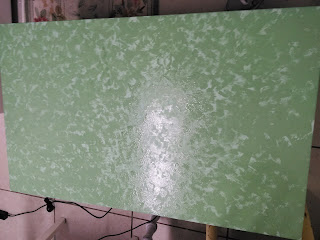
Next I mixed several shades of green together and painted the top of the table. Don't worry about getting great coverage because you will do two more coats. Let dry well between each coat and vary the direction of your brush stokes.
After the top dried I mixed some darker green, but not too dark, and just dabbed it all over with a sponge, trying to make it look like grass. Good thing toddlers aren't picky about their scenery!
While this was drying I spent about an hour trying to come up with a configuration for the track that would be super cool. I bought several different train sets from Ikea and wound up only being able to use the one listed above.
The table is smaller than the train tables you can buy so not a lot of room for multiple tracks, if you want something bigger, buy a bigger table and do the same thing.
After I have my super cool track design, I set it up on the table and traced a river leading to a pond and a road for all those matchbox cars.
I removed the train ( it doesn't get attached until the last step) and painted the water and the road. When they were dry I took another sponge and some really dark green paint and blotted on some tree tops.
Let everything dry for 24 hours. After that time paint a coat of ModPodge over the entire table top. When that dries, add one more coat for durability. Again, let it dry for 24 hours.
Now attached your tracks using E6000 ( I'm sure you could use something else but that's what I had on hand) making sure the edges line up well so the train will roll smoothly.
That's it! You are now officially the best momma, grandma, auntie, friend, whatever to the toddler in your life!
Wednesday, January 6, 2016
Monday, January 4, 2016
Sundried tomato pesto pasta
Wow, it's been a while since I posted anything on this blog but I intend to change that! My first post of the new year is recipe, which is insane because I do not cook!
I found some amazing pesto at the grocery store and threw together this Sundried Tomato Pesto Pasta ( try saying that five times fast!)
It's super easy and can be modified to suit your family. The ingredient list is short:
Sundried tomato pesto
pasta
anything else you want to throw in!

I put chicken and a can of chopped tomatoes, it would have been great with grape tomatoes, maybe some black olives. Shrimp, zucchini, the list goes on and on
, and you could serve it hot or cold. Just do whatever works for you.
It was quick and yummy, a twist on traditional spaghetti. I only used about 2 tablespoons of the pesto, a little goes a long way!
Give it a try and let me know what you add to make it for your family.
I found some amazing pesto at the grocery store and threw together this Sundried Tomato Pesto Pasta ( try saying that five times fast!)
It's super easy and can be modified to suit your family. The ingredient list is short:
Sundried tomato pesto
pasta
anything else you want to throw in!

I put chicken and a can of chopped tomatoes, it would have been great with grape tomatoes, maybe some black olives. Shrimp, zucchini, the list goes on and on
, and you could serve it hot or cold. Just do whatever works for you.
It was quick and yummy, a twist on traditional spaghetti. I only used about 2 tablespoons of the pesto, a little goes a long way!
Give it a try and let me know what you add to make it for your family.
Subscribe to:
Comments (Atom)


